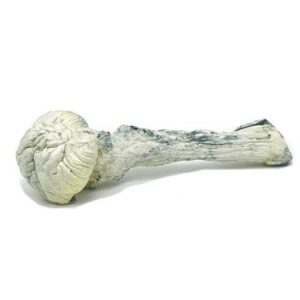
Buy Magic Mushroom Grow Kit Golden Teacher Online
€65.00
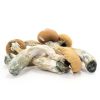
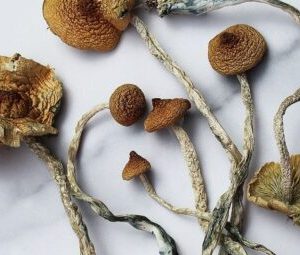
The Golden teacher is a classic cubensis around for ages. The yellow gold like caps and wise teachings gives this mushroom strain it’s name. Expect medium size to large mushrooms with wide caps, ideal for spore printing
Buy Magic Mushroom Grow Kit Golden Teacher XL by Mondo®
Buy Magic Mushroom Grow Kit Golden Teacher Online
Years of planning and testing have resulted in the next generation of Mondo® Golden Teacher XL magic mushroom grow kits teacher. The Golden Teacher XL grow kit is now even better than it ever was. Compared to the first generation of Mondo®XL magic mushroom grow kit, the next generation is improved with
*some strains produce more flushes than others. The first three flushes are the largest. Buy Magic Mushroom Grow Kit Golden Teacher Online
Meet the new standard of easy grow kits
The Mondo® Golden Teacher XL magic mushroom grows kit is slightly different than the grow kits you may have used before. These are mainly ‘under the hood’ differences and are not easily seen.
Just like the previous and other easy mushroom grow kits, you do not need to use additional spores. During the laboratory process, the spores have developed in mycelium inside the substrate (the cake) in the grow box.
How to store the grow kit correctly
It is recommended to start the cultivation process right away. If you decide to start growing later, you may store the grow kit in the refrigerator (2°C to 8°C) for 2 weeks after the production date. First, wrap the grow kit in a plastic shopping bag and close it well
Temperature
The ideal temperature is 24°C. Do not have the temperature drop under 18°C and not exceed 29°C. To keep the temperature from dropping under 18°C, you can use a thermal mat to maintain the ideal temperature. A Thermo mat is a must-have in the winter or colder regions of the world.
Light
The Mondo® ‘Golden Teacher’ XL magic mushroom grow kit only needs light for the mycelium to ‘understand’ it has reached the surface. Only then, mushrooms will grow. A few hours of fluorescent/artificial light or indirect sunlight a day is more than enough. Direct sunlight kills the mycelium, so avoid the sun shining directly on the grow kit.
Water / Misting
The day after you start the process you begin with misting. Open the grow bag by removing the paperclip. Do not spray directly on the cake, but spray one time against every side of the bag. So you mist once a day, four sprays. Misting also vents fresh oxygen inside the bag. Right after misting, close the bag again with the paperclip.
Mushrooms
If the conditions are optimal, you can expect the first small mushrooms (the pins) to appear between 5 and 16 days. This also depends on the strain. Some cubensis strains grow slower than others.
Flushes
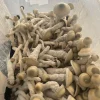
The mushrooms come up in groups. This can be a small or large group. That depends on the strain. A growth like this is called a flush. Mushrooms are almost never ripe at the same time. You can get more than one flush out of a kit. The first two flushes are the largest. When more flushes come, they will be smaller than the previous one.
Picking
Mushrooms are ripe and should be picked when the veil between the hat and the stem has just torn. Don’t wait much longer. Use surgical gloves or disinfect your hands, wrists, and arms. Pick the mushrooms that are ripe and let the others continue to grow. Remove the mushrooms from the cake by taking hold of the base of the mushroom between the thumb and index finger. Rotating your hand clockwise slowly, until the mushroom lets go. Do not pull out the mushrooms. This would risk damaging the mycelium and killing it. most of the larger mushrooms have been picked, also pick the smaller ones and the pins as well.
Mushrooms that grow from the sides
Mushrooms grow where the light reaches and where there is little penetrating resistance. Because the cake has light shining on the sides, the mushrooms might also grow there. Some growers wrap the sides of the grow box in aluminum foil to keep the sides dark, but this doesn’t always work well.
When mushrooms grow there, they can be picked just before you soak the kit:
Clean hands! Take the grow box out of the bag and place it upside down on your other hand. Wiggle the plastic box so that the cake will fall out, onto your hand. The box box can be positioned in a disinfectant surface. Now you have this hand free to pick the mushrooms from the sides of the cake. When all mushrooms are picked, you can place the cake back as it was, in the plastic box and continue to the soaking process.
Soaking
Again, with disinfected hands or gloves; take the grow box out of the large grow bag. Fill the box with fresh, potable water. Take the lid out of the ziplock bag and use it to close the grow box. Place the closed grow box in a soaking Bag or use your own clean plastic shopping bag and wrap it around the box. Close it well and place this in a refrigerator (2°C to 8°C) for 12 hours. Water will now soak through the cake, preparing it for the next flush.
During the soaking, you can hang the grow bag with a micron filter upside down to dry. Make sure to hang it upside down, so no microorganisms will access the bag. Many growers prefer to use new and unused grow bags after every flush.
After 12 hours take the soaking Bag with the grow box, out from the fridge and unpack it.
The end
When no more mushrooms grow out of a grow kit after the second flush for at least three weeks, or when the Mondo® ‘Golden Teacher’ XL Magic Mushroom grow kit turns green, red, grey, or yellow; the grow kit can be disposed of. The change in color is a sign that the grow kit is contaminated with another fungus or a bacteria. No more mushrooms will grow out of the Mondo® ‘Golden Teacher’ XL Magic mushroom grow kit and the grow kit should be thrown away in the garbage outside.
Spores
When you are too late picking the mushrooms, they will drop their spores. The cake and the mushrooms will turn black/purple (some other cubensis strains red/brown) because of the spores. This is not really a problem; it just doesn’t look very pretty. When mushrooms release their spores, they also start to degrade and the active ingredients are breaking down. Mushrooms will lose some of their potency.


